Showing posts with label crafts. Show all posts

Monday, January 6, 2014

Wine Cork Hooks

If you read this blog regularly, you know that I have been working on updating the closet in the back hall to make it more of a mud room. If you don't read the blog, but want to know more about the project, check out the posts here, here, and here.

I have spent a few hours browsing for bins and hooks for storage in the cabinets. I think I have found most of what I am looking for, but until I pull the trigger and input my credit card information, I decided to try a project with wine corks.

The inspiration came from reading this post on A Beautiful Mess. It got me thinking about all the wine corks that I had hidden in drawer in the kitchen. I'm not sure why I save them, I just do. Then, my mind wandered to the browsing that I had just been doing for the closet. And then Pinterest popped into my head (because it tends to go there, always) and I remembered all of the clever things that people had done with wine corks. Why not try it myself?

I have to admit that I thought this one would fail epically. And, it was completely trial and error. But, it worked. Here is what I came up with:


You may be thinking that these look like corks, sitting on a surface, but they are not. They are hooks... in the closet. I know, crazy, right?

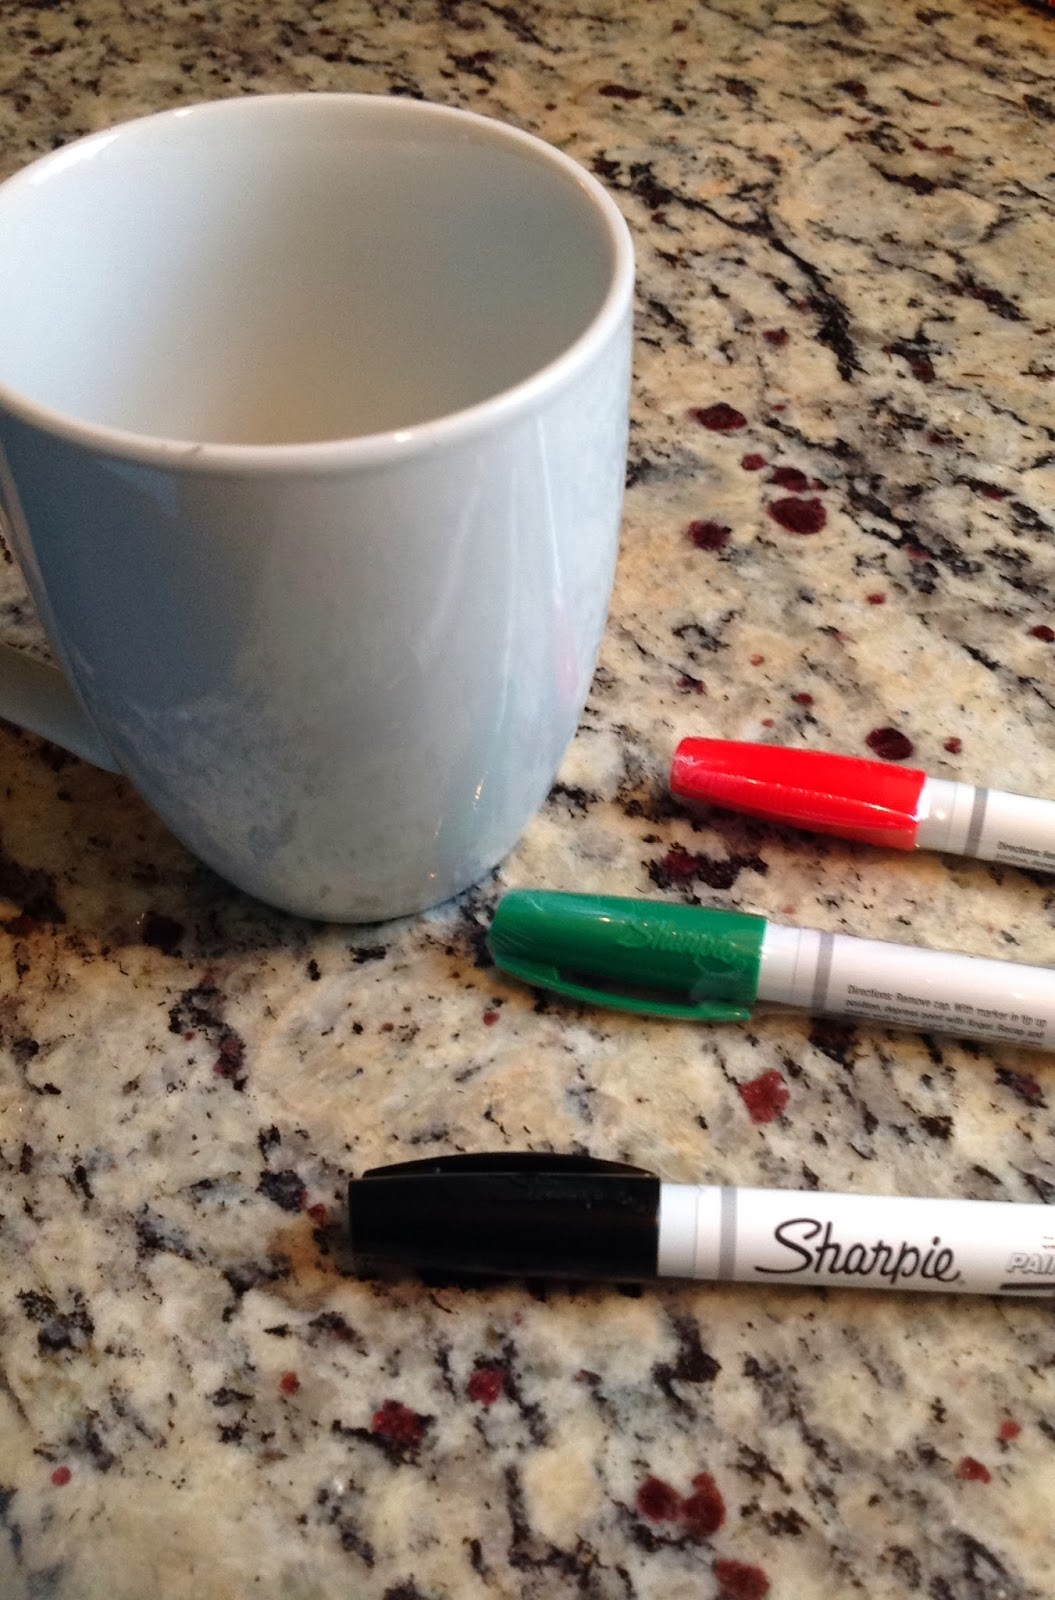
First I scavenged for corks and found these three. They are all rubber corks. I am not sure what would happen with real cork ones. I have a feeling they might split when you drill the hole into them, but maybe not. 


Although I was originally going to have them sticking straight out, I realized that each of them could have a completely different orientation on the wall. So, crazy me, I tried all three ways.

First I had to figure out where to put them on the wall. I had a command hook lower in the closet so my 2 1/2 year old could hang up his own jacket. I pulled off the hook (and paint and wall with it. Oops!) and used that area to hang my first hook.

I drilled the cork with a 1/4" drill bit. I wanted the hole to be big enough to get the screw in, but small enough so it wouldn't move around too much. I tried a variety of sizes and this is the one that worked the best.  I also mistakingly drilled through the entire cork, oops! If I did this again, I would have only gone halfway through. Luckily the ones that went all the way through were when I was trying out smaller drill sizes so the holes aren't as gaping as they could have been.
 
I made the holes depending on how I wanted the corks to hang on the wall.

I used drywall anchors to secure them to the wall. At first I was going to put the screw into the cork and then screw it into the wall. It didn't work. So, instead, I put the screw into the wall leaving about a quarter inch hanging out of the wall.


Then, I put the cork onto the screw,
and hung something on it to make sure that it was secure and wouldn't twist on the screw. 
It worked! Although if you want it to be more secure on the screw you could add a dab of glue into the hole before you put the cork on the screw.  The reason that I didn't is because I am afraid of what might happen if I ever want to take the corks off the wall. Theoretically you should be able to just unscrew the cork, but one never knows...

Here is the third one, which is actually more of my original idea:

 I kind of like them. And they were cheap free, so why not? If I get sick of them I can always take them down. And now I have hooks to hang some more of our winter gear. Good thing because it is snowing...again!

What do you think? This took all of 20 minutes. So it was quick, and easy!


Monday, December 9, 2013

Homemade Magnet Board

The Dare to DIY link party is hosted by Kim at Newlywoodwards, Cassie at Primitive and Proper, Michelle at Decor and the Dog and Rachel at Maybe Matilda. Thanks Ladies!

****

This is the story of how my simple idea of creating my 2 1/2 year old a magnet board turned into a week long project...because I tend to go WAY overboard every time.

Here is the board:
Here is the story:
A few weeks ago I saw these on Zulilly and thought, "the boys will LOVE them!
http://ecx.images-amazon.com/images/I/715rWwSHMZL._SL1500_.jpghttp://ecx.images-amazon.com/images/I/71wIgh9pEnL._SL1500_.jpg
So I bought them envisioning the 6 year old practicing his spelling and the 2 1/2 year old working on his letter identification. (Yes, I am a teacher. These are the things I get excited about.) Immediately after this daydreaming session I realized that I had no idea where the boys would use these fun magnets. We already have letter magnets on our fridge and the clutter DRIVES ME CRAZY so I really didn't want to add to it.

I quickly searched Pinterest for ideas and saw a TON of huge oil drip pans used as magnet boards SO cool and easy! But, not quite what I was looking for. Then I realized that I could make a more custom board really easily using the magnetic primer that I used last year on the boys' Giant Chalkboard and Train/Lego Table. I knew my next step would be to get something to paint on, so I ran to HD and grabbed a large rectangle of MDF and some more magnetic primer.

Luckily I had some experience with this primer so I knew that the key to success was to shake it up REALLY, REALLY well and then shake it some more. If you don't all the metallic particles will sit at the bottom and you will just be priming your board with black paint that isn't magnetic (yes, I did that last year. GRRR). I also know that the paint is SUPER thick and you kind of feel like you are slopping it on but that is okay. 

The paint can says to apply two or three coats to make a magnet stick. My tip is to have a magnet with you to check out how magnetic your board is and then decide if you need another coat. From my experience it will take at least three coats. I did four on this project.

While the paint was drying, I raided my leftover paint cans in the basement. Originally I toyed with the idea of leaving it black like the giant chalkboard, but this was going to live in Max's room so I wanted it to be a little different for him. I found three cans of paint in different shades of blue. 
Sherwin Williams Northstar, a bluish gray which happens to be our master bedroom color, Respite, a bright denim color that Ben picked out when we first moved in, (It has since been painted over because it was too blue...it took less than a year for that to happen) and Sailboat by BEHR which was the water color on the train train/Lego table. 

My plan was to create a gradient color for the board. By putting the darkest color (Sailboat) at the bottom and the lightest (Northstar) at the top, I was hoping that it would look a little like sea and sky. 

I also toyed with painting a chalkboard near the bottom so that Max could work on writing his letters. That idea was quickly nixed when he did this:
Yes, that is chalk and, yes, that is our couch. I guess it looked like a big canvas for him to express himself. The first time he did it, I kept my cool and explained about chalk only being for chalkboards and driveways. When he did it a second time I had a Mommy meltdown. There might have been a little a lot of yelling and a quick trip to his bedroom for time out (It wasn't my finest moment). Suffice it to say, he will not be allowed to have chalk (or any other writing utensils) in his room unsupervised. I can always add a square of chalkboard paint when he gets a little older.

Here is the first coat with the blue color. Since the magnet primer is black, I knew I would need more than one coat. I was worried that too many coats would make it less magnetic so I ended up doing three and sanding lightly between each coat to try to knock back the paint a little. I didn't blend the colors until the third coat.


While the paint was drying on the board, I ran to HD again (trip number 2 for this project) and grabbed some moulding that I will use to frame out the board. Then I put three coats of red spray paint on it.


When the paint dried I measured my painted board and decided how much of the board I wanted my moulding to cover (I opted for four inches which left a little overhang) and then cut 45 degree angles for my "picture frame." This is the first time I have done this. I even set up the saw myself which is a huge deal because it COMPLETELY freaks me out. But I did it, and only had to make one correction cut. It was WAY easier than I thought. I just made sure to measure and remeasure, and dry fit as I went to make sure each piece worked where I wanted it to.

I used Liquid Nails adhesive to attach the moulding to the board because I didn't want to deal with nails and filling the holes and repainting.

And here she is again in all her glory! I feel like I should name her. Any ideas?

I also ordered this set of foam magnets to add to the board. Max can use these picture magnets to make up stories or spell out the words of the pictures on the magnets. He could also sort the magnets into different categories (the kid is a sorting fool).
http://ecx.images-amazon.com/images/I/51veSDFgUlL._AA160_.jpg

Sorry that I don't have a pretty finished picture. I can't put the board up in Max's room until he gets it for Christmas, so for now it is on the floor in the basement, although I leaned it up against the door for you guys! I am also going to add some small hooks (probably of the Command strip variety) to the underside of the moulding to hang small pails so that Max can store the magnets he isn't using in them. I will update this post after Christmas so you can see it all pretty and hanging in his room!

Tuesday, December 3, 2013

Finishing Up the No Sew Bean Bag Project

So, way, way, way back in October I shared a no sew bean bag project here. Well, I was always planning on getting this gift into a more "finished" state before wrapping it for my 2 1/2 year old (not that he will really care. 

So, I got out all the supplies again and started by writing the color words on each of the bean bags with a black Sharpie. I tried to print the words as neatly as possible so that he could easily read and identify the letters. No fancy script for this project...


I then pulled out the rest of the blue material, folded it in half so the inside pattern was on the outside, and placed the hem tape inside the two pieces of fabric as close to the unfinished edge as possible. I left about four inches by the opening without tape.


I ironed the edges, then folded over the fabric around the opening. Again, I placed hem tape as close to the edge of the unfinished ends as possible and checked to make sure I had created a pocket.


After ironing, I used my Sharpie to make sure the opening was still there around the top of the fabric.


Then I used a paper clip (I couldn't find a safety pin. Those usually work better) to help me a piece if ribbon through the pocket.


When I was done, this is what it looked like.


I flipped the bag right side out...


Wrote Max's name on one side because he likes to have his name on things...


Then put the bean bags inside the bag, tied it up, and labeled the other side so that my dear son wouldn't forget what was inside. 


One project done! It only took one and a half months. Is your project timeline as pathetic as mine? What are you creating? Any no sew projects

Monday, December 2, 2013

DIY Custom Bowl and Mugs for our Christmas Eve Tradition


The Dare to DIY link party is hosted by Kim at Newlywoodwards, Cassie at Primitive and Proper, Michelle at Decor and the Dog and Rachel at Maybe Matilda. Thanks Ladies!

The theme of today's "Dare to DIY" is entertain. For this project, I created some customized tableware for my family. Although they could be used as bowls and mugs for everyday life, these have actually been created for a special event in our home - the opening of our Christmas Eve Box.

On Christmas eve the boys open a box that includes everything we need to have a cozy Christmas Eve movie night, cuddled around the fire. Last year the box included pajamas and slippers, a new movie, hot chocolate, and popcorn. This year, there will be comfy pants, a new movie, a new popcorn bowl (pictured below) with popcorn, and hot cocoa mugs (I plan on using a fancy crock pot recipe for our Christmas Eve cocoa).

Okay, enough back story. Here is how I created the goods.

Actually, it was really easy. First I went to Target and found white bowls and mugs. I was extra psyched because there was an extra 10% off with Cartwheel for the white dinnerware. (Wahoo, bonus savings!)  Then I bought some Sharpie paint pens that are specifically for ceramics. (I have previously made the mistake of using the regular Sharpies and baking the mugs which Pinterest said would work. Pinterest lied!)


Fair warning: I am about as far from an artist as you can get so I typically rely on stick figures and bubble letters.

I started with the mugs. I wanted each of the boys to have their own, so I made sure to put their name on their mugs and then a little bit about the things they love and are great at. Here is what I came up with:

Obviously I free-handed it all. I did not really have much of a plan, I just added as I went and tried not to over do it. (I think I overdid it.)

Then I tackled the bowl. Again I relied on stick figures and bubble letters. For the holiday addition I searched for a clip art that I liked and then tried my best to recreate it. Yes, this is my best work. Sad! Or, perfectly imperfect? (Oh, and obviously the black mark is my attempt at privacy, added to the picture not to the bowl itself.)


So, there you have it. Customized mugs and popcorn bowl. The paint pens are really easy to use and went on pretty smoothly. The black was fine tip and the red and green were medium. I actually think the medium were easier to use, but the fine tip was better at details (obviously) so it might be a good idea to have a combination of both. 

Although tableware will be used for our Christmas Eve box, the same idea could be used to make mugs or plates for Christmas dinner. Your guests could take them home at the end of the dinner, maybe you could even fill them with leftovers? Or you could create a platter to use with whatever your contribution is to the dinner and leave it with the host/hostess as a thank you. So many options. What other ideas do you have?


Friday, November 15, 2013

Giving Thanks Leaf Banner

I admit that I am much more of a Christmas person than a Thanksgiving person. This is probably because I inevitably eat WAYYY too much food, pass out, and wake up feeling simultaneously hungry and sick every year.

That being said, I do like the idea behind the holiday. It is important to appreciate what you have (the fact that we have enough food for me to get myself sick every year is a huge thing to be thankful for) and thank those around you for supporting you throughout the year. It is a time to visit with family, share memories, and solidify bonds that may have been overlooked during the hecticness of everyday life.

Christmas sales and marketing seem to be coming earlier and earlier every year helping to overlook the Thanksgiving holiday, however I believe it is important for me to take time to be thankful, share my thankfulness with the people around me, and teach my children to appreciate what they have.

To help my boys realize how lucky they are, we make a point to share things that we are thankful for starting at the beginning of the month and going to Thanksgiving. This year we are working on a little craft project to share what we are thankful for with anyone who comes to visit us.

To start, I had the boys do a little painting. They simply used watercolors on large pieces of white paper. I told them to use "leaf" colors. After the paint dried I traced a maple leaf pattern on the paper. I also added another shaped leaf where I did not have room for the maple leaf but had a large empty space.

Then I cut out the leaves.

Each day I used a black Sharpie to write what the boys told me they were thankful for on the leaves. I encouraged them to think of new things each day, although my 2 year old seems to REALLY be thankful for bananas. When we had enough time I let my 6 year old write his own leaves. This helped him practice his spelling and penmanship. (Wahoo! Bonus learning time!)

When I had a small pile of leaves I started stringing them up. I had wanted to use brown craft paper rope, or something that looked a little more organic, but I ran out of steam and ended up ransacking my craft box. So, I ended up with white thread (I know, not inspiring).

I added a small loop behind each leaf to keep them separated when I hung them up.


Here is what we have so far. You may notice that there are some construction paper leaves mixed in. That is what I started with, but I ran out of paper and I think the painted leaves look prettier. 

If the boys keep doing one or two leaves each we will have a ton by Thanksgiving. I am going to stop this garland and start a new one with the next pile of leaves. I will then be able to hang the leaf banners from the light above the kitchen table. 


It's kind of cute, right?
Are you guys doing anything to give thanks this November? I know that there are a TON of ideas on Pinterest. Ah, gotta love Pinterest!

Thursday, November 14, 2013

An Easy Wedding Gift

My sister was married this summer. In the craziness of leaving the boys for a week, flying across the country, wedding preparations, and family obligations it somehow slipped my mind to get her a gift. (I know, I suck) Luckily Christmas is right around the corner and I have a great customized gift in the works for her...more on that later.

In the meantime I did put together just a little something to help her and her new hubby remember their big day. During the wedding weekend I was like that spiky haired kid stealing the gum ball machine in "Can't Hardly Wait." I pocketed everything that I thought might bring back great memories from the weekend; Coasters at the bars we visited (it was easier for me to remember to do this since I was 7 months pregnant and the only one not over-indulging on any given night.), flyers and brochures from places we visited, flowers from the wedding, fabric triangles that I pulled off of the banners that they strung around the restaurant where they had their reception, giant pine cones from the location of the wedding itself, well, you get the idea.

When I got home, I arranged all of the goods as best as I could and displayed them in a shadow box. Many of the things I grabbed did not make it into the display because there was not enough room and it was already starting to look cluttered. It was quick, but meaningful. I hope that they like it. I did something similar with my own wedding and have it hanging in my bedroom.


The banners and hearts were added digitally by me to protect people's privacy.

So easy, and pretty! 

Wednesday, October 30, 2013

Easy Prettified Wooden Letters

Yes, I know that "prettified" is not a word, but I was looking for an adjective that was somewhat interesting and all that I could think of was prettified, so I went with it. Now, let's move on...

One of the items on my Dream Big list is to personalize Rylan's nursery. It was Max's room first, and we have been handing down bedding, furniture, and decorations through all the babies.

While I was pregnant I looked all over for inspiration on how to decorate the nursery for baby #3. I saw a TON of names on walls. Now, this isn't a new trend. In fact, it is possible that it is on its way out, but it is something that I have liked, but never done. So I decided that one element of the nrsery had to be these letters. Now, they aren't really that expensive, but I didn't really have the budget to spend $40 plus on this one piece of decoration (three kids, remember?). So, I bought these white wooden letters at JoAnn Fabrics. They were very cheap inexpensive.

I wasn't quite sure what I wanted to do to decorate them, so I bought a few things in the colors that I was thinking would work, and hoped that inspiration would strike when I got home. One thing you need to know about me is that I am all about instant gratification. The more steps and time that it takes for me to finish a project, the more likely that it will turn out badly because I rush at the end.
So, I was looking for something quick and easy in hopes that I wouldn't ruin these simple lovely letters.

Once I laid everything out I decided that I really didn't feel like painting and waiting for the paint to dry (I know, I am pathetic), so I now have some lovely craft paints for my next project. I also knew that if I didn't get this project done NOW, I probably wouldn't be motivated again for the next few months, if ever.

My eyes drifted to the Washi tape. I have seen so many posts about how wonderful the tape is, and seen so many lovely projects, that I was having trouble believing the hype. But, I had picked up some rolls of tape from Target just to play around with it. It is pretty and I figured that if worst came to worst I would have some beautifully wrapped gifts.

This was my favorite of the ones that Target had in stock. Their supply was pretty low even though I had seen tons of choices just weeks earlier. Apparently lots of people have jumped on the Washi train.


I really like the pattern on it. It is subtle, but I thought it would pop nicely against the white. So, I decided to try it out. Here is what I came up with.

I know the lines aren't straight, but I already told you, a perfectionist I am not. I suppose I could have used a straight edge to mark my lines. I could have also cut the tape with an Exacto knife to get around the curves more cleanly and make perfect edges, but instead I ripped the tape. (Yup, that's how I roll.)

I tried to keep in mind that the letters would be up on the wall, so I paid attention to the edges and underneaths since it is a pretty good chance that they will be seen. The back of the letters are not as pretty, but who cares? No one will see them anyway.

Initially I thought that I would do each letter with a different tape, or combination of tapes. However, I tend to be one of those people who overdoes things. So I restrained myself and stuck with this one roll of tape. I did allow myself to vary the stripes just because I didn't want it to be too boring, and I knew that they would never come out matching.

Here is what I had when I was done.
I really think Rylan likes them, don't you? I don't have a finished in the room picture because this is the first thing that I have done for his room, but it is a start, right? I promise to post one when I get there.

This was even easier than I could have imagined. I am completely obsessed with this tape now. And, I have three and a half rolls of it left! What should I tape next?


Thursday, October 24, 2013

No Sew Bean Bags - Let's get crafty!

Recently, on Zulily, I saw a set of beanbags that looked pretty fun. (I admit it, I'm a sucker for bean bag.) These bean bags came in all of the primary colors, which would be great for my 2 year old who frequently tells me that everything is either yellow or green. I also recalled my oldest (eldest??) son's kindergarten screening where they had him catch bean bags. (Let's just say I wish that I had practiced that particular skill more with him before the screening.)  I quickly put the bean bag set in my shopping cart and was just about to hit the checkout button when I realized that I could probably whip some up pretty easily. This thought, along with my hope to have a partially homemade Christmas, motivated me to take a trip to JoAnn Fabrics. Look what I found!


I am not much of a seamstress due to the fact that my sewing machine is broken (or maybe I just don't know how to use it) so I picked up some bonding tape and some quilting quarters in a rainbow of colors. 


It took me all of five minutes (probably less) to make a super easy beanbag. If I had taken more time, I probably could have made the beanbag more square, but my boys really won't care. 

All I did was cut a square of fabric (I should be able to make four beanbags per fabric quarter), fold 
the square inside out, and iron the hem tape around two edges (one edge was made by the fold in the 


fabric). 


Then I turned the fabric right side out, put some beans in the bag, and closed up the last side with more tape. 


SO easy! Admittedly I am not much of a crafter, nor do I have any patience (I just want to get it done!) so someone with more skills could probably make these even cuter and better than me but, once again, my boys will not really care they will just love to throw these little bean bags around. (Uh oh, I didn't think about that!)

Originally I was going to embroider the color words on the front of the bag but the baby is crying. 
Maybe next time!


What cute, easy crafts are you tackling?