Showing posts with label dreambig. Show all posts

Wednesday, November 6, 2013

It All Started with a Chair

Is it strange that I have a sudden urge to build a room around a chair?  I think it might be, and yet it seems like a good starting place for decor... it's probably something that you learn in design school.


I spotted the Bella Side Chair on Joss and Main and IMMEDIATELY became obsessed with it. I am not sure why but my mind started scrolling through multiple places where it could go in my house. It would look awesome at the head of my dining table. And, since it comes in a set of two, it is totally affordable. But the white in it doesn't seem like a smart move with three small boys. Plus, a dining table usually has food around it, which would also not be good mix with the fabric.

So, the table is not really where I would like to put the chair...the polka dots are also too similar to my living room wall color. Nope, I have the perfect spot. A little corner in my upstairs hallway that I have been dying to use as a reading nook.

Originally I was going to put built-ins in the wall to the right between the studs for books, but there are electrical wires along the inside of most of the wall and I really don't feel like becoming an electrician and moving wires. Now I am thinking that I will need to do something this, this, or this. I may even be able to DIY something with a little help from Ana White.

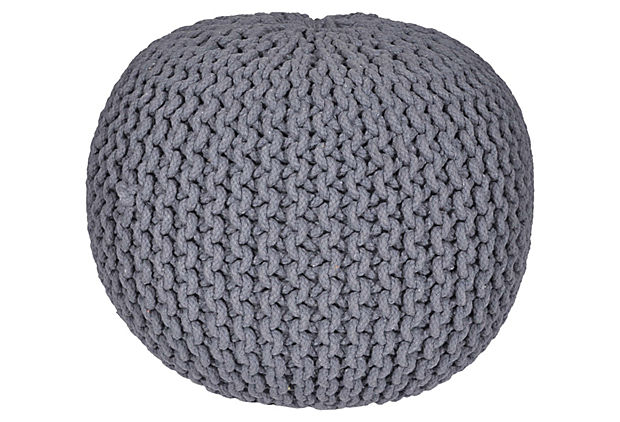
I was also thinking that a little pouf would be perfect for this space. When it is not in use, it could slide underneath the chair. If someone wanted to do a little reading all they would need to do is slide it out and use it as a footrest, or a place to put a drink, it could really be for anything. Although in my home it would more likely be used as a boat or space ship by the boys.

Maybe something like this one from One King's Lane 
https://okl.scene7.com/is/image/OKL/Product_KML17206_Image_1?$product$


or  this from West Elm
Zigzag Dhurrie Mini Pouf


I wish I could show you the finished product with all of it put together., but I am not talented enough to do a mock-up in Photoshop. For now, it will have to stay in my brain. The perfect reading nook. Maybe some day. A girl can dream. *SIGH*

What has caught your eye lately? Any chair dreaming going on?

Wednesday, October 30, 2013

Easy Prettified Wooden Letters

Yes, I know that "prettified" is not a word, but I was looking for an adjective that was somewhat interesting and all that I could think of was prettified, so I went with it. Now, let's move on...

One of the items on my Dream Big list is to personalize Rylan's nursery. It was Max's room first, and we have been handing down bedding, furniture, and decorations through all the babies.

While I was pregnant I looked all over for inspiration on how to decorate the nursery for baby #3. I saw a TON of names on walls. Now, this isn't a new trend. In fact, it is possible that it is on its way out, but it is something that I have liked, but never done. So I decided that one element of the nrsery had to be these letters. Now, they aren't really that expensive, but I didn't really have the budget to spend $40 plus on this one piece of decoration (three kids, remember?). So, I bought these white wooden letters at JoAnn Fabrics. They were very cheap inexpensive.

I wasn't quite sure what I wanted to do to decorate them, so I bought a few things in the colors that I was thinking would work, and hoped that inspiration would strike when I got home. One thing you need to know about me is that I am all about instant gratification. The more steps and time that it takes for me to finish a project, the more likely that it will turn out badly because I rush at the end.
So, I was looking for something quick and easy in hopes that I wouldn't ruin these simple lovely letters.

Once I laid everything out I decided that I really didn't feel like painting and waiting for the paint to dry (I know, I am pathetic), so I now have some lovely craft paints for my next project. I also knew that if I didn't get this project done NOW, I probably wouldn't be motivated again for the next few months, if ever.

My eyes drifted to the Washi tape. I have seen so many posts about how wonderful the tape is, and seen so many lovely projects, that I was having trouble believing the hype. But, I had picked up some rolls of tape from Target just to play around with it. It is pretty and I figured that if worst came to worst I would have some beautifully wrapped gifts.

This was my favorite of the ones that Target had in stock. Their supply was pretty low even though I had seen tons of choices just weeks earlier. Apparently lots of people have jumped on the Washi train.


I really like the pattern on it. It is subtle, but I thought it would pop nicely against the white. So, I decided to try it out. Here is what I came up with.

I know the lines aren't straight, but I already told you, a perfectionist I am not. I suppose I could have used a straight edge to mark my lines. I could have also cut the tape with an Exacto knife to get around the curves more cleanly and make perfect edges, but instead I ripped the tape. (Yup, that's how I roll.)

I tried to keep in mind that the letters would be up on the wall, so I paid attention to the edges and underneaths since it is a pretty good chance that they will be seen. The back of the letters are not as pretty, but who cares? No one will see them anyway.

Initially I thought that I would do each letter with a different tape, or combination of tapes. However, I tend to be one of those people who overdoes things. So I restrained myself and stuck with this one roll of tape. I did allow myself to vary the stripes just because I didn't want it to be too boring, and I knew that they would never come out matching.

Here is what I had when I was done.
I really think Rylan likes them, don't you? I don't have a finished in the room picture because this is the first thing that I have done for his room, but it is a start, right? I promise to post one when I get there.

This was even easier than I could have imagined. I am completely obsessed with this tape now. And, I have three and a half rolls of it left! What should I tape next?


Tuesday, October 15, 2013

The Dream Big List

I have started what my husband calls my "Dream Big List - home edition." Our brand new house has a five page list of "projects" and general upgrades that we were stupid enough to think would happen soon after we moved in. I am no longer that naive and realize that if I don't make a list of everything I want to do with the house, I may never get what I want. As it is, I don't see most of this happening for years, maybe even decades; especially since I keep adding to it. But, hey, dream big or go home, right? Or maybe it should be, "Dream big or move."

Anyways, here is what I've got so far - Subject to additions, subtractions, and other revisions.

First Floor
Kitchen
* Replace cabinet over stove with hood
*Add tile back splash
* move microwave into cabinet in island
* add wine fridge
* move cabinets and add open shelving around sink

Dining Area
* add built-in seating
* move light/new light
* upgrade chairs and possibly table

Living Room
*add built-ins around fireplace
* add cabinet over fireplace to hide TV and mount TV onto the wall
* create an accent wall with ship lap
* new living room furniture
* paint door

Mud Room Area
* change closet to built-in bench, cubby to help with organization
* add shelving with doors to extra area over closets
* install sliding barn door 

Bathroom
* crown molding

Stairs
* add board and batten to staircase and landing
* create photo collage in staircase

Second Floor
Hall
* Find console table
* add board and batten (?)
* add crown molding
* replace baby gate at top of stairs

Master Bedroom
* Make/Find headboard
* Add built-in cabinets around windows and possibly window seat
* Replace carpet with hardwood
* Crown molding (?)
* Fix entry to crawl space so that it can be used as storage
* Add organization to closet

Master Bathroom
* Replace tub surround with tile
* Add hooks for towels
* Personalize
* Add tile around sink area

Yellow Bedroom
*crown molding
* closet organization 

Blue Bedroom
*crown molding
* closet organization 

Nursery
* decorate for Rylan
*crown molding

Boys' Bathroom
* Add hooks for towels
* Personalize

Basement
* Finish Basement
        - Organize work room
        - storage for all of our crap cherished heirlooms
        - add guest bedroom
        - possible half bath under stairs
        - playroom/ family room

Garage
* Paint walls
* Organize
* Add locker/cubby organizer by door

Outside
Front Yard
*Front patio 
*Tree/Large shrub for privacy from driveway across the street
* Landscaping at front of house
* Window boxes
* Stain front porch
* Paint ceiling
* Paint stair treads
* Put up house numbers
* Paint door trim
* Add to supports (brick? beef up?)

Backyard
* Add privacy trees (partially complete)
* Add shed
* Fireplace
* Patio/deck
* Build bridge to paths into woods
* Landscaping

Long-term (i.e. Big, Big, Big, dreams)
* Addition off of dining area to be office/playroom
          - create patio off of new addition
          - add built in grill attached to propane
          - add pergola
* Rework 2nd floor hallway to create access to a finished third floor to add two rooms and possibly 1/2 bath

So, that is it. From time to time I may go back to edit, add to, delete this list as my dreams change. I may even post about inspirations for some of the items on this list. If you can't wait for that, check out my Pinterest board, "For Home" most of my inspiration ends up in there!

Just looking at this list makes me feel completely overwhelmed... wouldn't it be nice to be rich and just be able to do it all at once? There I go dreaming again!