Showing posts with label DIY. Show all posts

Saturday, February 1, 2014

Entryway Spruce Up.... For now

Currently the area by our front door - let's call it an entryway, even though it really isn't - looks like this:
It's not much to look at. And when people come over it turns into a dumping ground for shoes, coats, and everything else. This annoys me greatly!

Eventually, we would like to build a half wall by the door such as this for the door side:
http://img.saifou.com/images/5834.jpg
From SaiFou Images (If you are the original poster of this image, please let me know so I can give you credit!)
And this for the living room side:
http://nestdesignco.com/images/tiburonresidence/4.jpg
Nest Design Co. Tiburon Residence


Unfortunately, we don't have the time, or funds for this right now, and I am a little concerned that the half wall will be an issue for people coming down the stairs which as to the right of the door. So I am going to try to complete a "For now" spruce up to deal with the issue for the time being.

The good news is that this one should be free. Here are my ideas for the space:
It's the expertly drawn picture to the right labeled "Front."

Basically, I am going to use one of my kitchen table chairs and a mirror with hooks that is living in the back hallway right now, to create a space for our guests to hang coats and sit to take off their shoes. We are still finishing up the back hall makeover (Yes, it has taken an entire month. Don't judge, I'm busy) and need to move the mirror and hooks.

During the planning process, this happened to one of the dining room chairs that we still haven't refinished.

So, I think I will use the broken chair as a sign that it wants to be a place to put our butts when we come in the front door.

I should have update on the upcycling of the broken chair in a few days! Stay tuned


Tuesday, January 28, 2014

Mud Room Closet Make Over... Wrapping it Up

When I started this mini-makeover/organization quest my back hall closet looked like this:

Now my closet looks like this:


In my book this is a success! There are still a few things from my original vision that I need to do such as put a fun stencil on the wall. But, for the most part, it is organized and done! Wahoo!

The cushion on the bench is actually a body pillow cover that I found on clearance from Target. I love the fact that it was a no sew solution.

Also, the wine cork hooks are still holding up great!

You may notice that the doors are still on the closet. That is mainly because I don't completely trust my family to put their stuff in their respective bins. So, until they are trained I am leaving the doors on. I do have a new home in mind for the doors (when we finish our basement) so they won't be there forever, but for now they are staying.

Here is the whole process up to this point:

Project Overload - First Up... Mud Room Closet Makeover 

Mud Room Closet Makeover - Day Two I Built a Bench! 


And my updated "To Do" List
1. Create bench
2. Create shelves for storage
3. Get baskets and bins to hang on side wall and to put on shelves
4. Get hooks for back wall and side wall for backpacks, jackets, and hats.
5. Figure out a fun color for the wall and/or finish (wallpaper? decals? wood planking?) Partially Complete
6. Install everything
7. "Make" cushion for bench
8. Decorate the wall across from the closet with mirror or chalkboard/photos/hooks

That feels pretty good. 
Next up, the wall across from the closet!

Monday, January 13, 2014

Mud Room Closet Makeover - Basket, Basket, on the Wall

Remember how just a few weeks ago (maybe less than that) I was complaining about all the stuff in our house? Well, here is a perfect example. This is the collection of my kids' hats and mittens that were in the back hall closet. I assure you that all of my children only have one head. So why do they have so many hats?
The baby, who is 4 1/2 months old, has no less than eight hats in the closet. Even if he wore a different hat every day of the week, he couldn't get through all of these hats. We never bother with putting mittens on him because he is usually bundled in his Bundle Me in his car seat. But for some reason he has four pairs of mittens.
The funny thing is that the kid who spends the most time outside has the least hats and mittens. However, that could be because he regularly loses them. Currently we have three sets of missing mittens that are somewhere between our house and school.
 And, the two year old... well, I'll let the picture tell the story.
After laying all of this out, I realized that no matter what kind of organization I came up with for the closet, I was destined to fail if I didn't edit what was being kept there. This was a huge "AHA" moment for me (although it probably shouldn't have been). Yes, what I am saying is, the less stuff you have, the less cluttered your house will be. I know, I just blew your mind, right?

I will work on it.

When I began working on the closet makeover, I planned to build a lovely cabinet with 16 cubby holes to stash all of the hats and mittens and sunscreen and other stuff but, I quickly realized designing it on my own and figuring out cuts and all that was WAYYY over my ability level. So, I decided baskets would be much easier. Many people had used window baskets in their closets like the ones here, or bins like the ones here.

I tried to order the window baskets from the first link but, although they were on the Lowe's website, they were not available. I searched for other window boxes to no avail. (Wrong time of year?) I ended up purchasing some of these "Media baskets" from Target.

I had a plan for hanging them that failed royally. (I almost put a "wait for it" in there.) So, after an hour and a half of trying things out, a trip to the Home Depot,  another hour of trying things out, a few breaks to relieve frustration, and at least one rant on the topic of why I INSIST on DIYing everything and how bloggers make everything so effing easy when in reality it is not, I ended up with this:
Phew! Let's just say, no "project" ever goes 100% smoothly for me. Or ends up the way I envisioned it. Just keeping it real for you!

Here is how I did it:

* I measured the space.
* Divided it by the number of baskets. 4
* Figured out how much room I wanted between the baskets. 3 1/2"
* Measured some more and marked up the wall


* Decided how many places I wanted to attach the baskets to the wall. 3.
* Marked up the wall some more
* Drilled pilot holes


 * Used wall anchors and my drill to knock them into the wall (who needs a hammer?)
* I used the screws that came with the wall anchors and some washers to attach the baskets to the wall. The idea came from here. Thanks "A Beautiful Mess!" Basically, I put the washer on the screw, then pushed the screw through the basket weave from the inside of the basket out. Then I screwed the screw into the wall anchor and voila! Hanging baskets.

Right now, it looks neat and clean in that corner of the closet. And, the boys have FAR less choices of hats in their individual baskets. I do have larger baskets on the shelf above the bench where I could put a few back-up hats in case the bus gobbles up some more.

Here is my updated "To do" list for the project:

1. Create bench
2. Create shelves for storage
3. Get baskets and bins to hang on side wall and to put on shelves
4. Get hooks for back wall and side wall for backpacks, jackets, and hats.
5. Figure out a fun color for the wall and/or finish (wallpaper? decals? wood planking?) Partially Complete
6. Install everything Partially Complete (Only the hooks to go!)
7. Make cushion for bench
8. Decorate the wall across from the closet with mirror or chalkboard/photos/hooks

I am almost done with this one! I am still thinking through some ideas for details of the project, but I have all the big pieces in place, or in transit. It looks like I will be averaging about a project a month this year. We will see!

Anyone else try to hang baskets this weekend? Or go on a rant about  DIY bloggers?  I must be feeling pretty ranty lately. (Not to be confused with randy) I have another one I'm currently editing for next week. I apologize in advance.

If you want to see where this project started, and how I have gotten to where I am today, here are the links:

Project Overload - First Up... Mud Room Closet Makeover

Mud Room Closet Makeover - Day Two I Built a Bench!

Mud Room Closet Makeover - Let's Build Some Shelves!

Monday, January 6, 2014

Wine Cork Hooks

If you read this blog regularly, you know that I have been working on updating the closet in the back hall to make it more of a mud room. If you don't read the blog, but want to know more about the project, check out the posts here, here, and here.

I have spent a few hours browsing for bins and hooks for storage in the cabinets. I think I have found most of what I am looking for, but until I pull the trigger and input my credit card information, I decided to try a project with wine corks.

The inspiration came from reading this post on A Beautiful Mess. It got me thinking about all the wine corks that I had hidden in drawer in the kitchen. I'm not sure why I save them, I just do. Then, my mind wandered to the browsing that I had just been doing for the closet. And then Pinterest popped into my head (because it tends to go there, always) and I remembered all of the clever things that people had done with wine corks. Why not try it myself?

I have to admit that I thought this one would fail epically. And, it was completely trial and error. But, it worked. Here is what I came up with:


You may be thinking that these look like corks, sitting on a surface, but they are not. They are hooks... in the closet. I know, crazy, right?

First I scavenged for corks and found these three. They are all rubber corks. I am not sure what would happen with real cork ones. I have a feeling they might split when you drill the hole into them, but maybe not. 


Although I was originally going to have them sticking straight out, I realized that each of them could have a completely different orientation on the wall. So, crazy me, I tried all three ways.

First I had to figure out where to put them on the wall. I had a command hook lower in the closet so my 2 1/2 year old could hang up his own jacket. I pulled off the hook (and paint and wall with it. Oops!) and used that area to hang my first hook.

I drilled the cork with a 1/4" drill bit. I wanted the hole to be big enough to get the screw in, but small enough so it wouldn't move around too much. I tried a variety of sizes and this is the one that worked the best.  I also mistakingly drilled through the entire cork, oops! If I did this again, I would have only gone halfway through. Luckily the ones that went all the way through were when I was trying out smaller drill sizes so the holes aren't as gaping as they could have been.
 
I made the holes depending on how I wanted the corks to hang on the wall.

I used drywall anchors to secure them to the wall. At first I was going to put the screw into the cork and then screw it into the wall. It didn't work. So, instead, I put the screw into the wall leaving about a quarter inch hanging out of the wall.


Then, I put the cork onto the screw,
and hung something on it to make sure that it was secure and wouldn't twist on the screw. 
It worked! Although if you want it to be more secure on the screw you could add a dab of glue into the hole before you put the cork on the screw.  The reason that I didn't is because I am afraid of what might happen if I ever want to take the corks off the wall. Theoretically you should be able to just unscrew the cork, but one never knows...

Here is the third one, which is actually more of my original idea:

 I kind of like them. And they were cheap free, so why not? If I get sick of them I can always take them down. And now I have hooks to hang some more of our winter gear. Good thing because it is snowing...again!

What do you think? This took all of 20 minutes. So it was quick, and easy!


Friday, January 3, 2014

Mud Room Closet Makeover - Let's Build Some Shelves!

First, let's admire my newly built bench in the mudroom/closet...
It fits perfectly! I love how the shoes tuck nicely below the bench without spilling out all over the place. We have PLENTY of room. In this picture each of the four members of the family who walk (baby not included) have three or four pairs of shoes under the bench. (If you want to read all about how this came together check out the posts here and here.)

And, just for fun, let's recap for a minute...
Here is the BEFORE
And after I cleaned it out...
 
Gross right?

The first step with dealing with the closet was to paint it. Originally I wanted a darker blue color  such as Hale Navy by Benjamin Moore. But, the Hubs quickly nixed that idea because he didn't want to buy paint. (GRRR) So I scavenged the basement for leftovers. Unfortunately, all of the leftovers had less than an inch of paint left in them. Not enough for the whole closet. So, I mixed some light blue/gray colors to make a custom color. This is a mix of Benjamin Moore's First Snowfall, and Sherwin Williams' Northstar. (Is it a no-no to mix different brands? Look at me breaking the rules!) I am still not completely happy with the color. *YAWN* But, I have some other ideas for stenciling that may make it a little more original. That will have to come later.

 And here is my To Do list for this project:
1. Create bench
2. Create shelves for storage
3. Get baskets and bins to hang on side wall and to put on shelves
4. Get hooks for back wall and side wall for backpacks, jackets, and hats.
5. Figure out a fun color for the wall and/or finish (wallpaper? decals? wood planking?) Partially Complete
6. Install everything
7. Make cushion for bench
8. Decorate the wall across from the closet with mirror or chalkboard/photos/hooks

This was my plan for the shelves in the closet. Spoiler Alert: "Was" is a very important word.
Look at that 6th grade math coming in handy. Yes, I seriously had to do the math out. DUH!
Everything was cut, sanded, primed, and painted. But, when we checked out the closet to find the studs on the back wall to screw the shelves into, they were nowhere to be found. Wierd? Then the Hubs remembered that the "guys" had had a hard time finding them when they hung our kitchen cabinets. You would think that with a new construction the studs would be pretty uniform. I guess not...frustrating!

So, we had to figure out a solution for plan B. (I did not think it was safe to screw the shelving into the wall with only drywall anchors.) We did easily find the studs in the side of the closet (because they were in the right place) so we used those studs and created this:


I am going to add some corbels for extra support towards the center of the shelves, but for now this was the best we could do. It is not ideal, but I am determined to make this work. Oh and the top shelf is really high (we have 9 foot ceilings on the first floor and there is a TON of wasted space in the top of the closets) but it will work for storing things we rarely use.

The boards are screwed and wood glued into the supports and the supports are screwed into studs with 3" wood screws. 

Here is the most up to date picture: 
Although it isn't my original vision, it looks WAYYY better than the original

                   VS

Let's update the "To Do" list again!
1. Create bench
2. Create shelves for storage
3. Get baskets and bins to hang on side wall and to put on shelves
4. Get hooks for back wall and side wall for backpacks, jackets, and hats.
5. Figure out a fun color for the wall and/or finish (wallpaper? decals? wood planking?) Partially Complete
6. Install everything Partially Complete
7. Make cushion for bench
8. Decorate the wall across from the closet with mirror or chalkboard/photos/hooks

What do you think? Anyone else tackling a project similar to this? Anyone else running into issues and having to make plan B, C, or Ds?

Thursday, January 2, 2014

Mud Room Closet Makeover - Day Two I Built a Bench!

Let me start by saying that, for me, Ana White's Simple Bench was relatively simple....as long as you are going for the rustic look. Which I am, of course. It is a little infuriating to see the picture of a clean, perfect bench, and then look at my creation, which is still a cute bench (if I do say so myself) but does not look like I put as much time and effort into it as I did. And boy, did I excel at the "rustic" part.If you want to read more about the beginning of this project and why I built a bench, check out this post.

After sanding, priming, and painting all the boards (remember how may? Yes, it took a while)

I started laying out the bench making sure to check for square, and following all of Ana's directions.

It was kind of like putting a giant puzzle together. I have to admit, I liked this part. Not only because I was figuring out a puzzle, but because I could also see it coming together.

Don't be fooled, there were some set backs. A few of the boards split on me.


Luckily I had some extra wood, so I cut replacements and did the whole sand, prime, paint routine again.

Once the bench was all put together, I simply filled the holes, sanded, and painted one last coat.
TADA!

I have to admit, I fully expected it to be wobbly, or completely unlevel, but it wasn't. Score one for me!  For my first try building something, ever, I think I did a pretty decent job. Not perfect by any means, and I'm sure it took me significantly longer than it would have for someone who knew what they were doing, but I like my little rustic bench. Oh, and for those of you wondering how much it cost, here you go:

Budget Breakdown
1x3  4@1.25 each
1x4 4@7.44 each
Wood glue 2.97
Screws 2@7.98 each
Square 4.97
Primer 14.98

Total: 73.64
BUT most people would have the primer, square, and wood glue (we actually had some, we just didn't check first. Dumb) and at least some of the screws. This would have brought our total in at $42.74. Not bad, right?

Wait until you see it in my mud room closet. I am in the process of getting that put together right now. Stay tuned!

If you have any other "simple" projects that you think I should try next, let me know. I will put them on my ever lengthening "to do" list. Have you built anything lately? Crossed anything off your "I've always wanted to list?"

Wednesday, December 18, 2013

Quick and Easy "Joy" Decoration

Here is my quick and easy home decor for the holidays. Seriously quick (less than 15 minutes) and seriously easy ( if I can do it anyone can).

The supplies:


Yes, the glass of wine is imperative when I am trying to throw something together at 10:00 at night...

If you notice, the glass balls I bought have different finishes. The matte balls were the easiest to work with. They clung to the glue much better. I would also recommend using the stronger hold glue sticks ( I used the lightest hold and I really had to slather it on).


I laid out the balls to form the letters making sure the hooks for the string were in the back except for the top, which I turned up so I could add ribbon to hang the letters. Then I just applied the glue where the balls met. 

When it was dry, I strung the ribbon through the loops at the top of the balls and hung them up. Make sure to string them through more than one bulb to help distribute the weight.


Easy peasy!


Monday, December 9, 2013

Homemade Magnet Board

The Dare to DIY link party is hosted by Kim at Newlywoodwards, Cassie at Primitive and Proper, Michelle at Decor and the Dog and Rachel at Maybe Matilda. Thanks Ladies!

****

This is the story of how my simple idea of creating my 2 1/2 year old a magnet board turned into a week long project...because I tend to go WAY overboard every time.

Here is the board:
Here is the story:
A few weeks ago I saw these on Zulilly and thought, "the boys will LOVE them!
http://ecx.images-amazon.com/images/I/715rWwSHMZL._SL1500_.jpghttp://ecx.images-amazon.com/images/I/71wIgh9pEnL._SL1500_.jpg
So I bought them envisioning the 6 year old practicing his spelling and the 2 1/2 year old working on his letter identification. (Yes, I am a teacher. These are the things I get excited about.) Immediately after this daydreaming session I realized that I had no idea where the boys would use these fun magnets. We already have letter magnets on our fridge and the clutter DRIVES ME CRAZY so I really didn't want to add to it.

I quickly searched Pinterest for ideas and saw a TON of huge oil drip pans used as magnet boards SO cool and easy! But, not quite what I was looking for. Then I realized that I could make a more custom board really easily using the magnetic primer that I used last year on the boys' Giant Chalkboard and Train/Lego Table. I knew my next step would be to get something to paint on, so I ran to HD and grabbed a large rectangle of MDF and some more magnetic primer.

Luckily I had some experience with this primer so I knew that the key to success was to shake it up REALLY, REALLY well and then shake it some more. If you don't all the metallic particles will sit at the bottom and you will just be priming your board with black paint that isn't magnetic (yes, I did that last year. GRRR). I also know that the paint is SUPER thick and you kind of feel like you are slopping it on but that is okay. 

The paint can says to apply two or three coats to make a magnet stick. My tip is to have a magnet with you to check out how magnetic your board is and then decide if you need another coat. From my experience it will take at least three coats. I did four on this project.

While the paint was drying, I raided my leftover paint cans in the basement. Originally I toyed with the idea of leaving it black like the giant chalkboard, but this was going to live in Max's room so I wanted it to be a little different for him. I found three cans of paint in different shades of blue. 
Sherwin Williams Northstar, a bluish gray which happens to be our master bedroom color, Respite, a bright denim color that Ben picked out when we first moved in, (It has since been painted over because it was too blue...it took less than a year for that to happen) and Sailboat by BEHR which was the water color on the train train/Lego table. 

My plan was to create a gradient color for the board. By putting the darkest color (Sailboat) at the bottom and the lightest (Northstar) at the top, I was hoping that it would look a little like sea and sky. 

I also toyed with painting a chalkboard near the bottom so that Max could work on writing his letters. That idea was quickly nixed when he did this:
Yes, that is chalk and, yes, that is our couch. I guess it looked like a big canvas for him to express himself. The first time he did it, I kept my cool and explained about chalk only being for chalkboards and driveways. When he did it a second time I had a Mommy meltdown. There might have been a little a lot of yelling and a quick trip to his bedroom for time out (It wasn't my finest moment). Suffice it to say, he will not be allowed to have chalk (or any other writing utensils) in his room unsupervised. I can always add a square of chalkboard paint when he gets a little older.

Here is the first coat with the blue color. Since the magnet primer is black, I knew I would need more than one coat. I was worried that too many coats would make it less magnetic so I ended up doing three and sanding lightly between each coat to try to knock back the paint a little. I didn't blend the colors until the third coat.


While the paint was drying on the board, I ran to HD again (trip number 2 for this project) and grabbed some moulding that I will use to frame out the board. Then I put three coats of red spray paint on it.


When the paint dried I measured my painted board and decided how much of the board I wanted my moulding to cover (I opted for four inches which left a little overhang) and then cut 45 degree angles for my "picture frame." This is the first time I have done this. I even set up the saw myself which is a huge deal because it COMPLETELY freaks me out. But I did it, and only had to make one correction cut. It was WAY easier than I thought. I just made sure to measure and remeasure, and dry fit as I went to make sure each piece worked where I wanted it to.

I used Liquid Nails adhesive to attach the moulding to the board because I didn't want to deal with nails and filling the holes and repainting.

And here she is again in all her glory! I feel like I should name her. Any ideas?

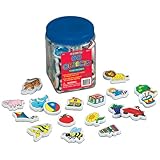
I also ordered this set of foam magnets to add to the board. Max can use these picture magnets to make up stories or spell out the words of the pictures on the magnets. He could also sort the magnets into different categories (the kid is a sorting fool).
http://ecx.images-amazon.com/images/I/51veSDFgUlL._AA160_.jpg

Sorry that I don't have a pretty finished picture. I can't put the board up in Max's room until he gets it for Christmas, so for now it is on the floor in the basement, although I leaned it up against the door for you guys! I am also going to add some small hooks (probably of the Command strip variety) to the underside of the moulding to hang small pails so that Max can store the magnets he isn't using in them. I will update this post after Christmas so you can see it all pretty and hanging in his room!